Network text analysis - Getting a Social Network
by textanalyticsman
Introduction
The previous post was about using the software to get normalized or canonical entities. As we have extracted the elements we have been looking for, it is time to build the actual social network using the normalized entities gathered on the previous post. However, before showing how to use the software to do this, I would like to describe how this process works behind scenes.
This process takes entities for each sentence or paragraph to create relationships between them when they co-occur on the same sentence or paragraph (this software has two options co-occurrence at sentence level and co-occurrence at paragraph level). These are the steps executed to do this for one document.
-
Set an empty edges list.
-
Read the document modified by the previous modules.
-
If is the end of the file finish the process.
-
Extract a sentence or paragraph from the document.
-
Extract entities that were identified and normalized in previous processes.
-
Create relationships between entities that appear in the same sentence or paragraph. For example let us say entities A, B, C y D appear in the same sentence or paragraph; this step will generate these edges.
A–B
A–C
A–D
B–C
B-D
C-D-
Add the edges shown on the previous figure to the edge list
-
Go to step 2.
After getting the list of edges for a corpus, the software calculates weights for edges. The same edge could appear several times in the same document or even in more documents. Thus, these edges are converted into one with a weight equal to the number of occurrences. Since this graph is undirected edges like A-B and B-A are considered the same and normalized in one edge with a calculated weight, in this case two.
Following, two options of the software are used. One to get the social network based on co-occurrence at paragraph level and the other get a file with a proper format to see the social network in Gephi.
Generate a social network with co-occurrence at paragraph level
-
Click on Analyzer » Generate social network » Co-occurrence at paragraph level. This option will open a screen that will be explained in the next point.
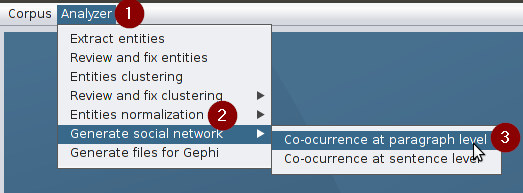
Option used to generate a social network with co-occurrence at paragraph level -
This screen is used to generate a social network with co-occurrence at paragraph level. After clicking on “Load available corpora”, you should select the corpus and one of the available cluster(s) configuration (a combination of MinPts and Epsilon) to see the list of normalized entities in this corpus and then you should click on Generate Social Network and you will get the list of edges. The list of edges (a graph represented by a list of edges) is shown in a table with information about each couple of nodes that are part of an edge (Source Description - Target Description), information about the paragraph where they co-occur and the weight of the edge.
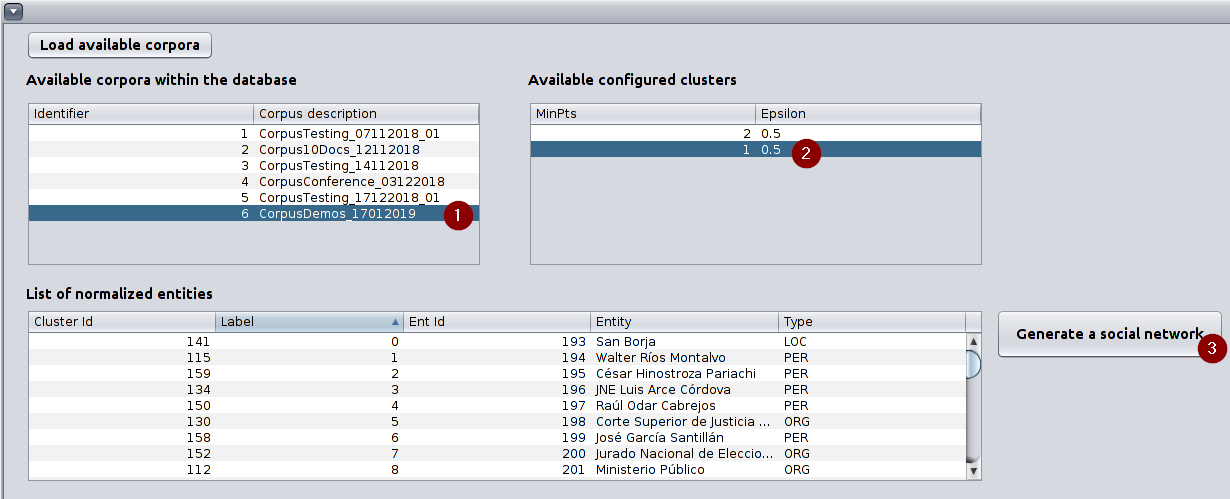
Screen used to generate a social network 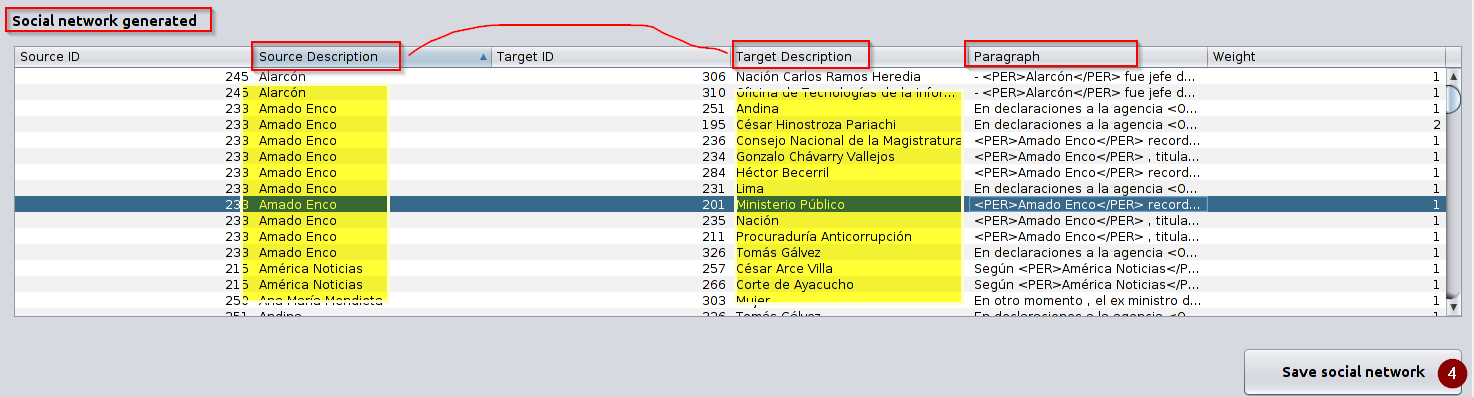
Social network extracted after clicking on “Extract social network”. -
Continuing with the previous screen, after clicking on “Save social network” the list of edges is saved on the database.
Generate files for Gephi
This module generates a couple of files, which represent the social network in a format that is understandable by Gephi so these files will be used to visualize the social network in Gephi.
-
Click on Analyzer » Generate files for Gephi.
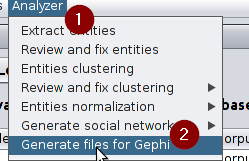
Option used to generate the files for Gephi -
Screen used to generate files for Gephi After clicking on “Load available corpora”, you should select the corpus and the available cluster(s) configuration (a combination of MinPts and Epsilon) to see the list of normalized entities and then you should click on “Load the Social Network”. After this, a panel will show the social network that has been generated before and then you should click on “Generate files for Gephi”.
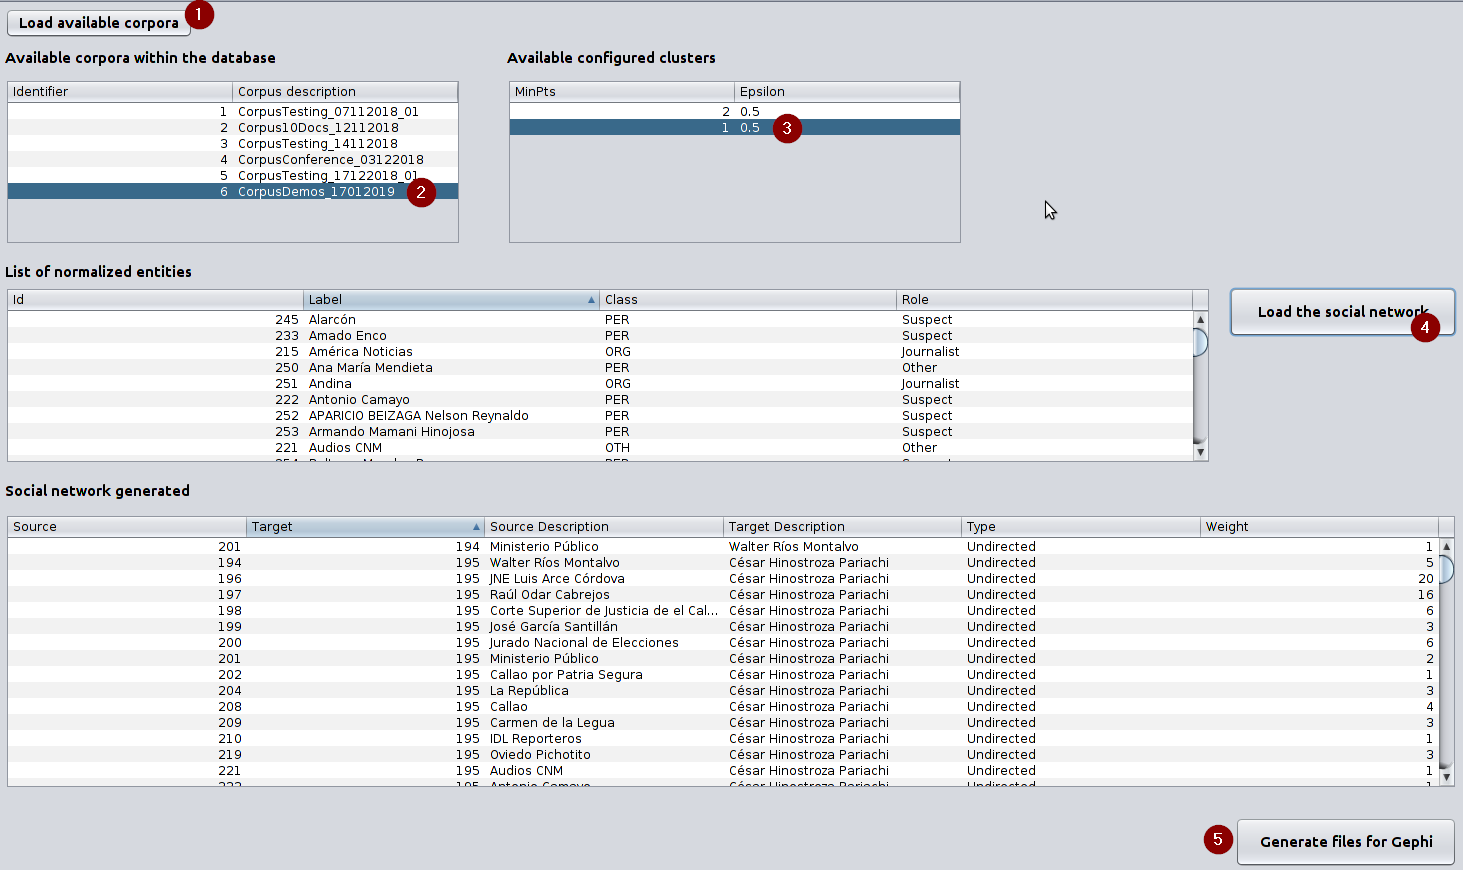
Screen used to generate files to visualize the social network in Gephi -
The module generates two files one with the nodes and the other with the edges as you can see on the following couple of figures.
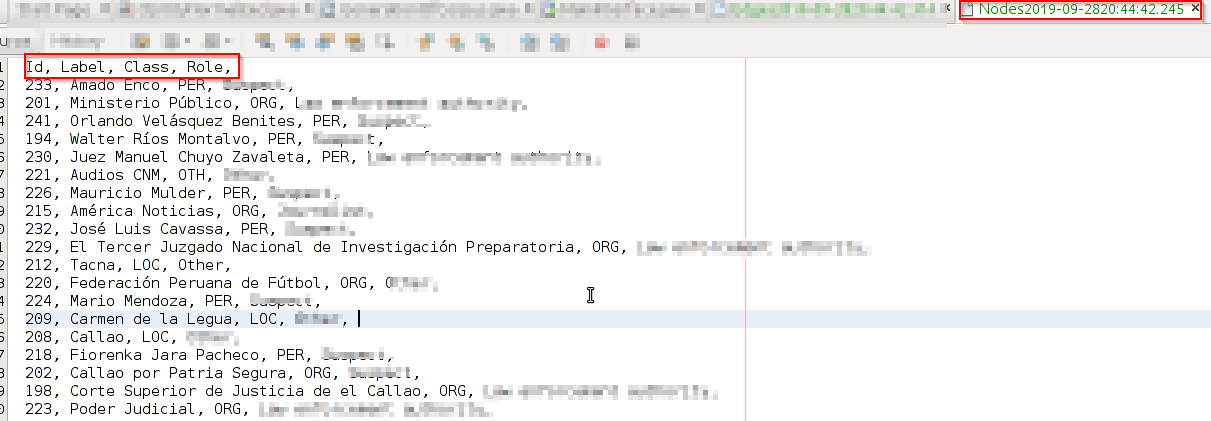
A sample from the list of nodes in a format understandable by Gephi 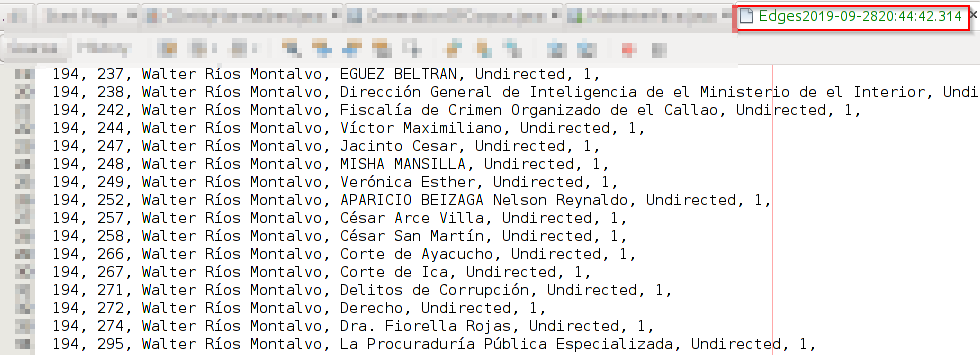
A sample from the list of edges in a format understandable by Gephi
Visualizing the social network
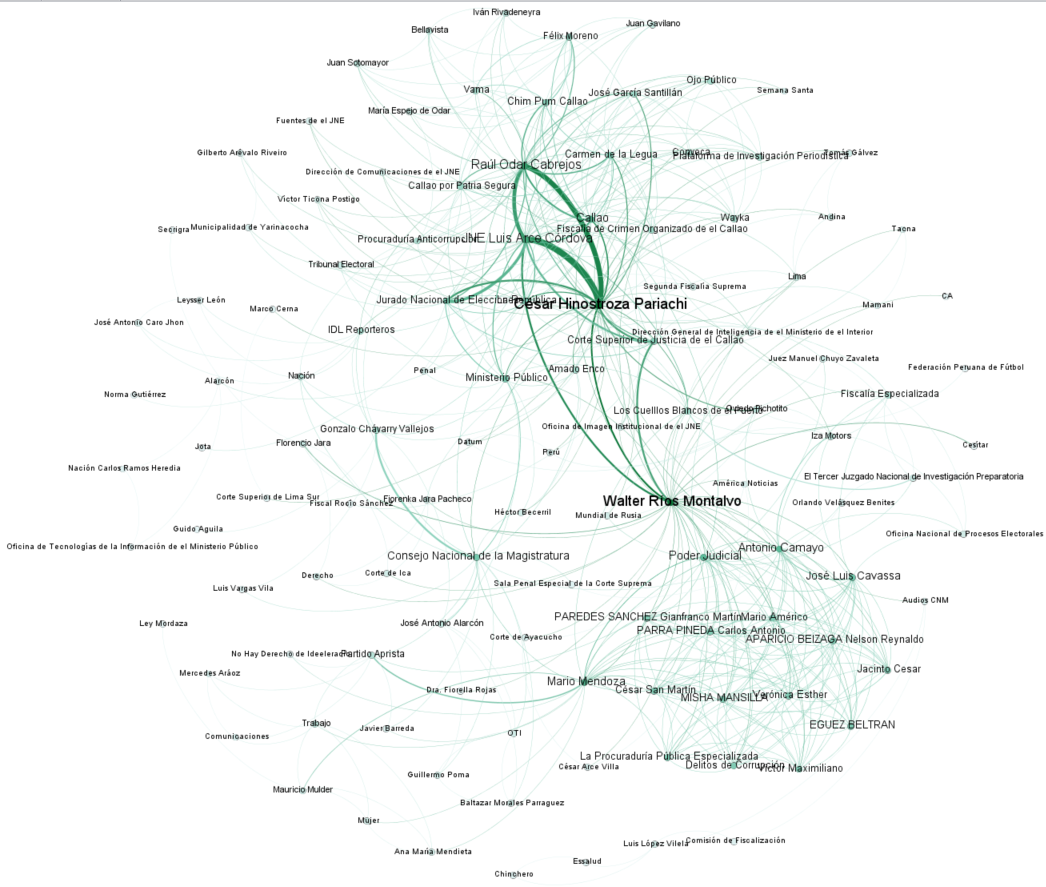
Now that we have two files one that represents nodes and the other, which represents edges on the social network (graph data structure), we can use Gephi to visualize the social network as can be seen on the following picture.
 |
|---|
| A social network generated through the analysis of 15 articles written in 2018 by a Peruvian newspaper called “La Republica”. The bigger the node, the greater its relevance on the network according to a metric called degree, which is calculated by Gephi. Importantly, the names who appear on this graph do not mean culpability or responsibility on the corruption case called “Los Cuellos Blancos del Puerto”. These are just the relationships between them as are described on those public available journalistic articles |
Conclusion
So far this software has been used to get the set a social network, which relate entities based on the co-occurrence at paragraph level. Furthermore, the software has been also used to generate a couple of files understandable by Gephi, which allows us the visualization of the networks and also its analysis using centrality measures such as degree centrality and betweenness centrality. Even though the whole process is still far from being easy, it can allow investigators the organization of several sources of information to get insights about them. Therefore, it is important to build and to improve software like this.
Subscribe via RSS